Week 2 - Right Seed, Right Time
- Posted on
- By Jen Mosson - Greenhouse Manager
- Posted in Seed Starting Series
- 0
Week 2 explains how Manitoba’s short frost-free season makes seed-starting timing critical, and breaks down simple indoor setups—from trays and domes to heat mats and grow lights—to help seedlings thrive.
When & How to Start Seeds Indoors
The right seed at the right time.
But what does that actually mean?
Does it really matter when you plant your seeds?
Short answer? Yes.
Long answer? Also yes… especially in Manitoba.
Last week we talked about days to maturity. This week, we’re digging a little deeper into why that number matters so much.
Why Timing Is Everything
Some plants simply take longer to mature than others.
Take peppers, for example:
• A regular bell pepper has fewer days to maturity.
• A spicy pepper usually needs more time — and more heat — to develop that kick.
That extra time matters. In Manitoba, our growing season is shorter, which means if we want those spicy peppers to succeed, we need to start them indoors earlier.
That’s what “right seed, right time” is all about.
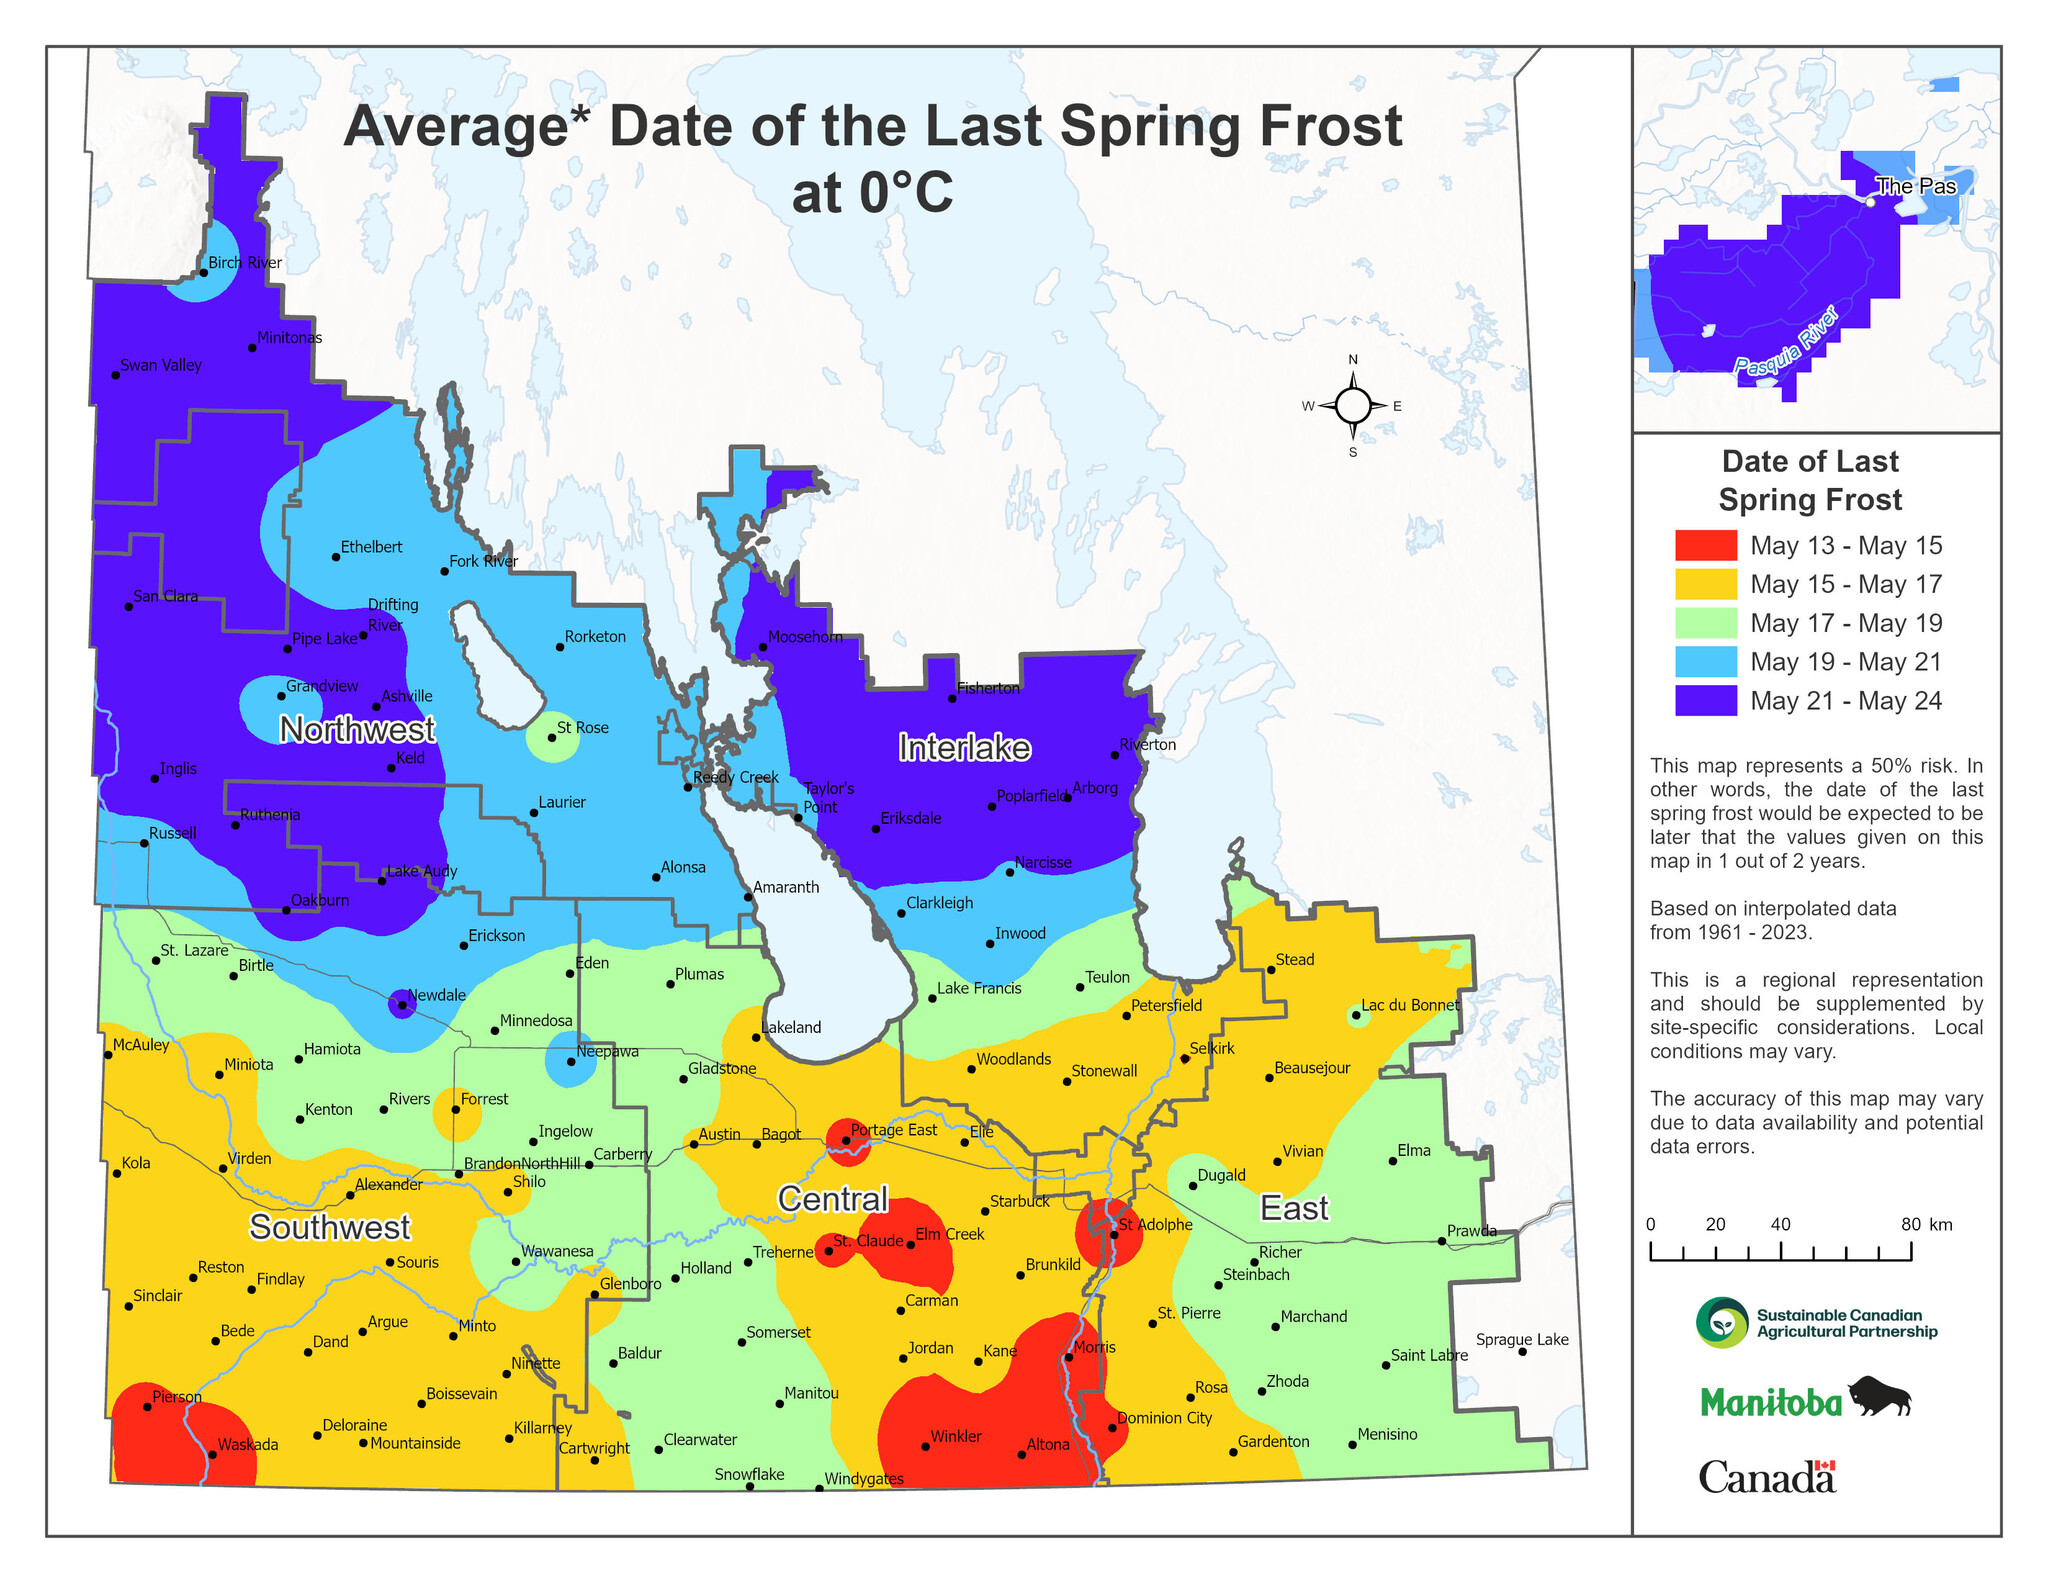
Frost-Free Days (This Is Important!)
Frost-free days are the number of days each year when frost is not a concern. That number determines what we can successfully grow.
In most of Manitoba:
• The average last frost date is May 15–20
• After that date, there’s less than a 50% chance of frost
• We typically get about 125–130 frost-free days
And that’s if Mother Nature is cooperating.
Those 125–130 days are your growing window. When you know how many days your plant needs to mature, you can work backward and figure out when to start it.
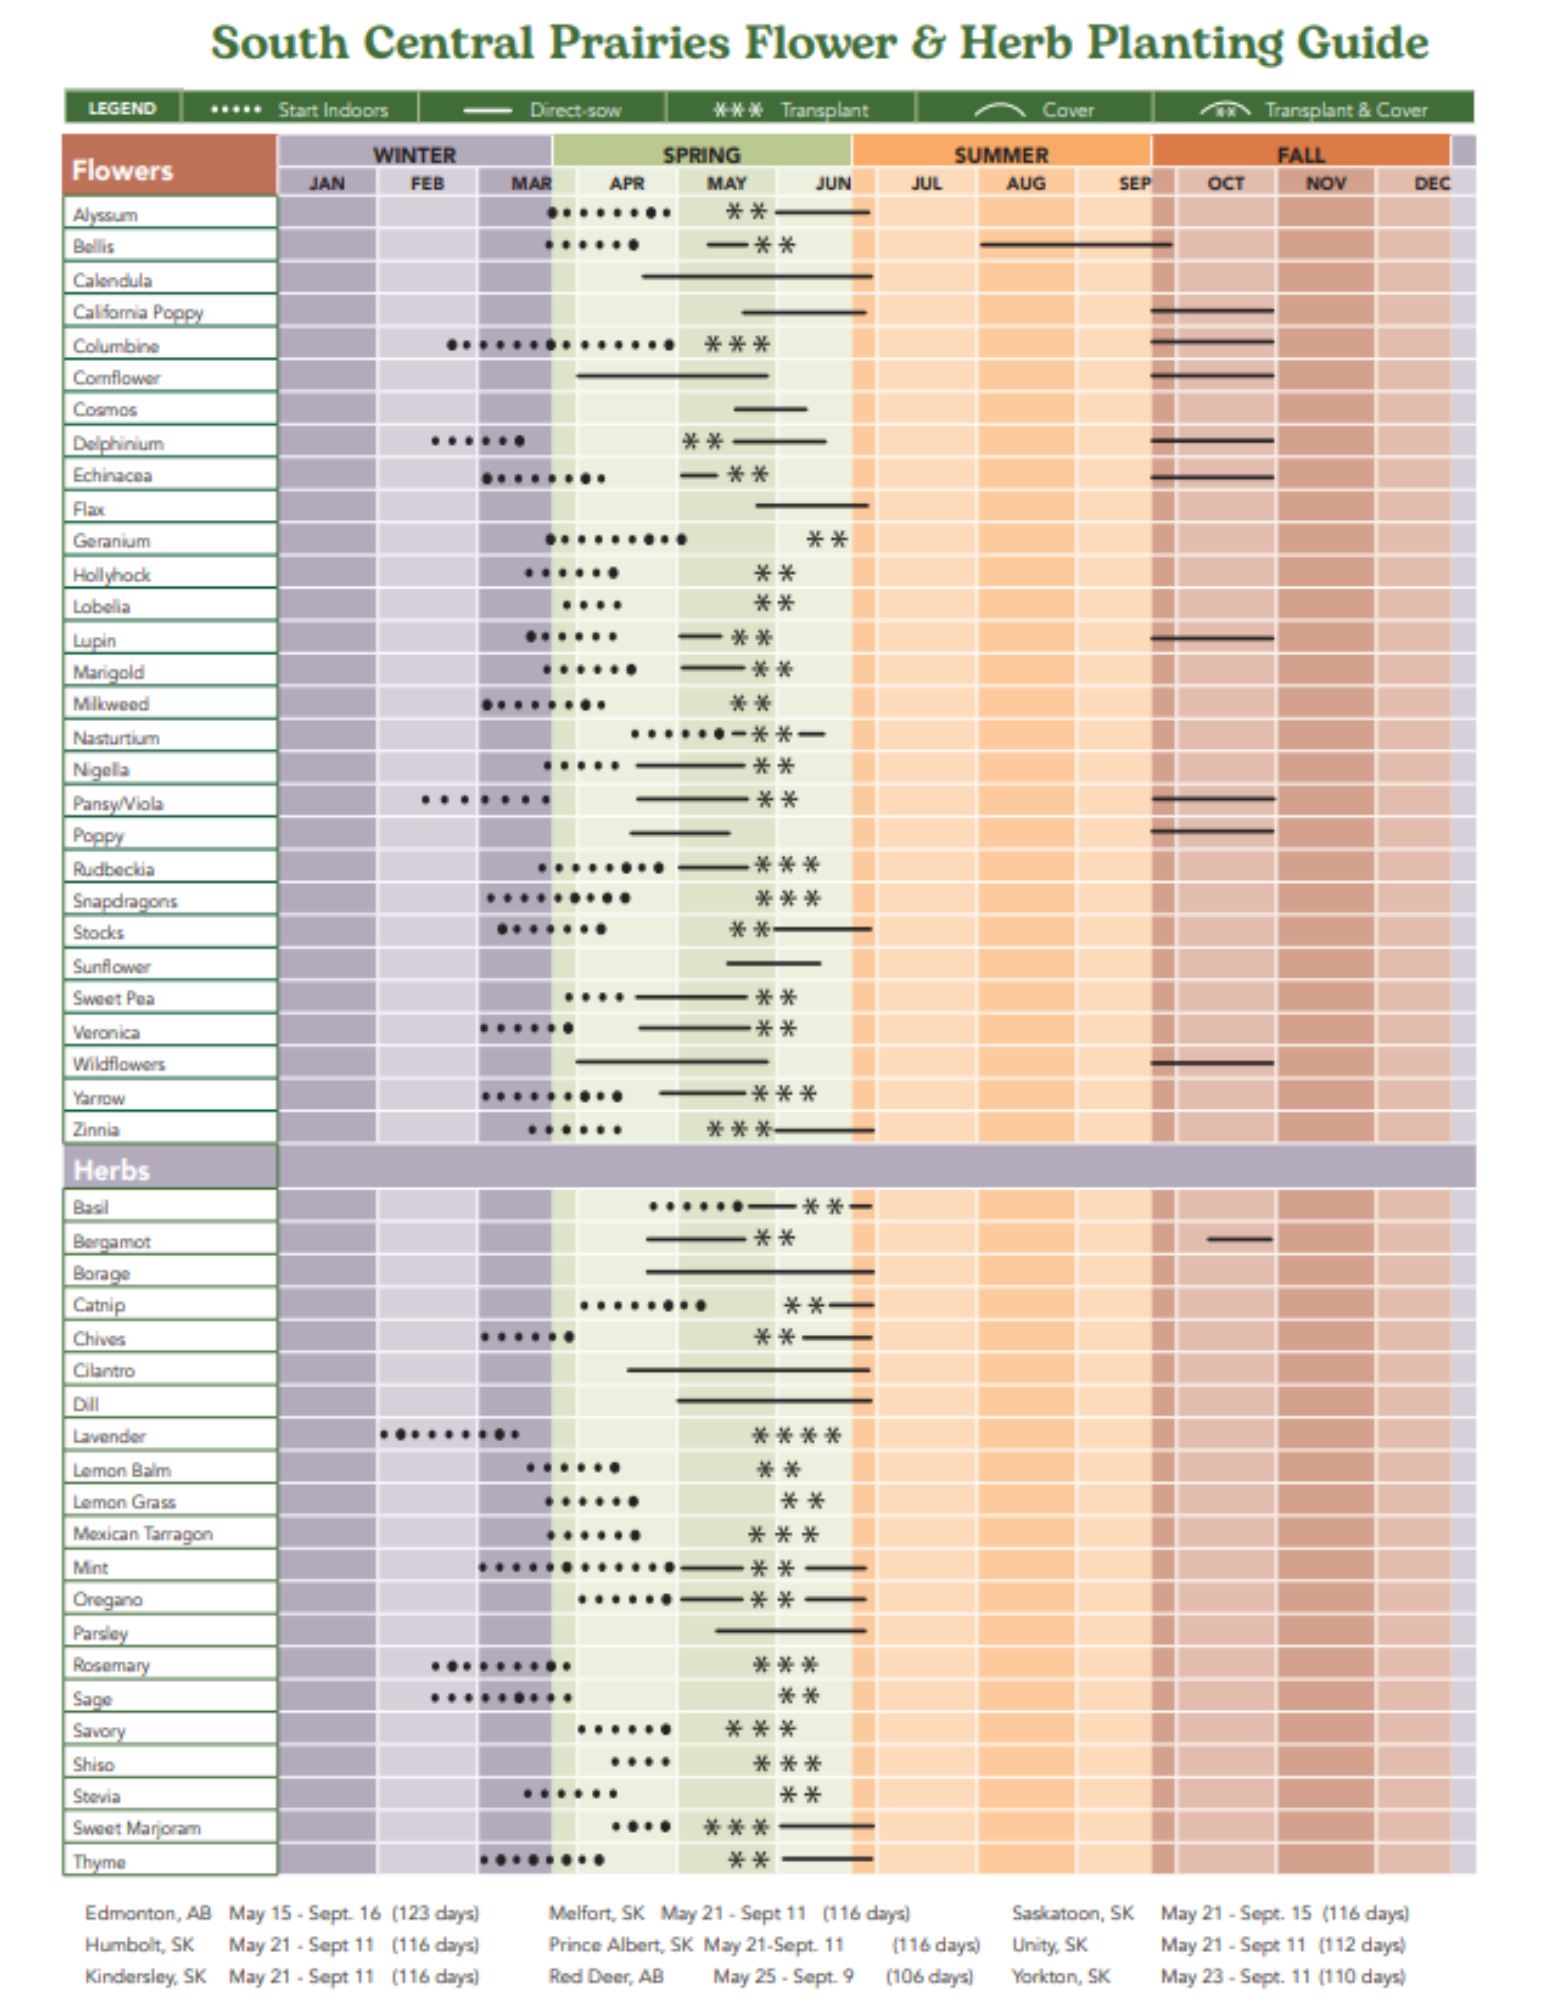
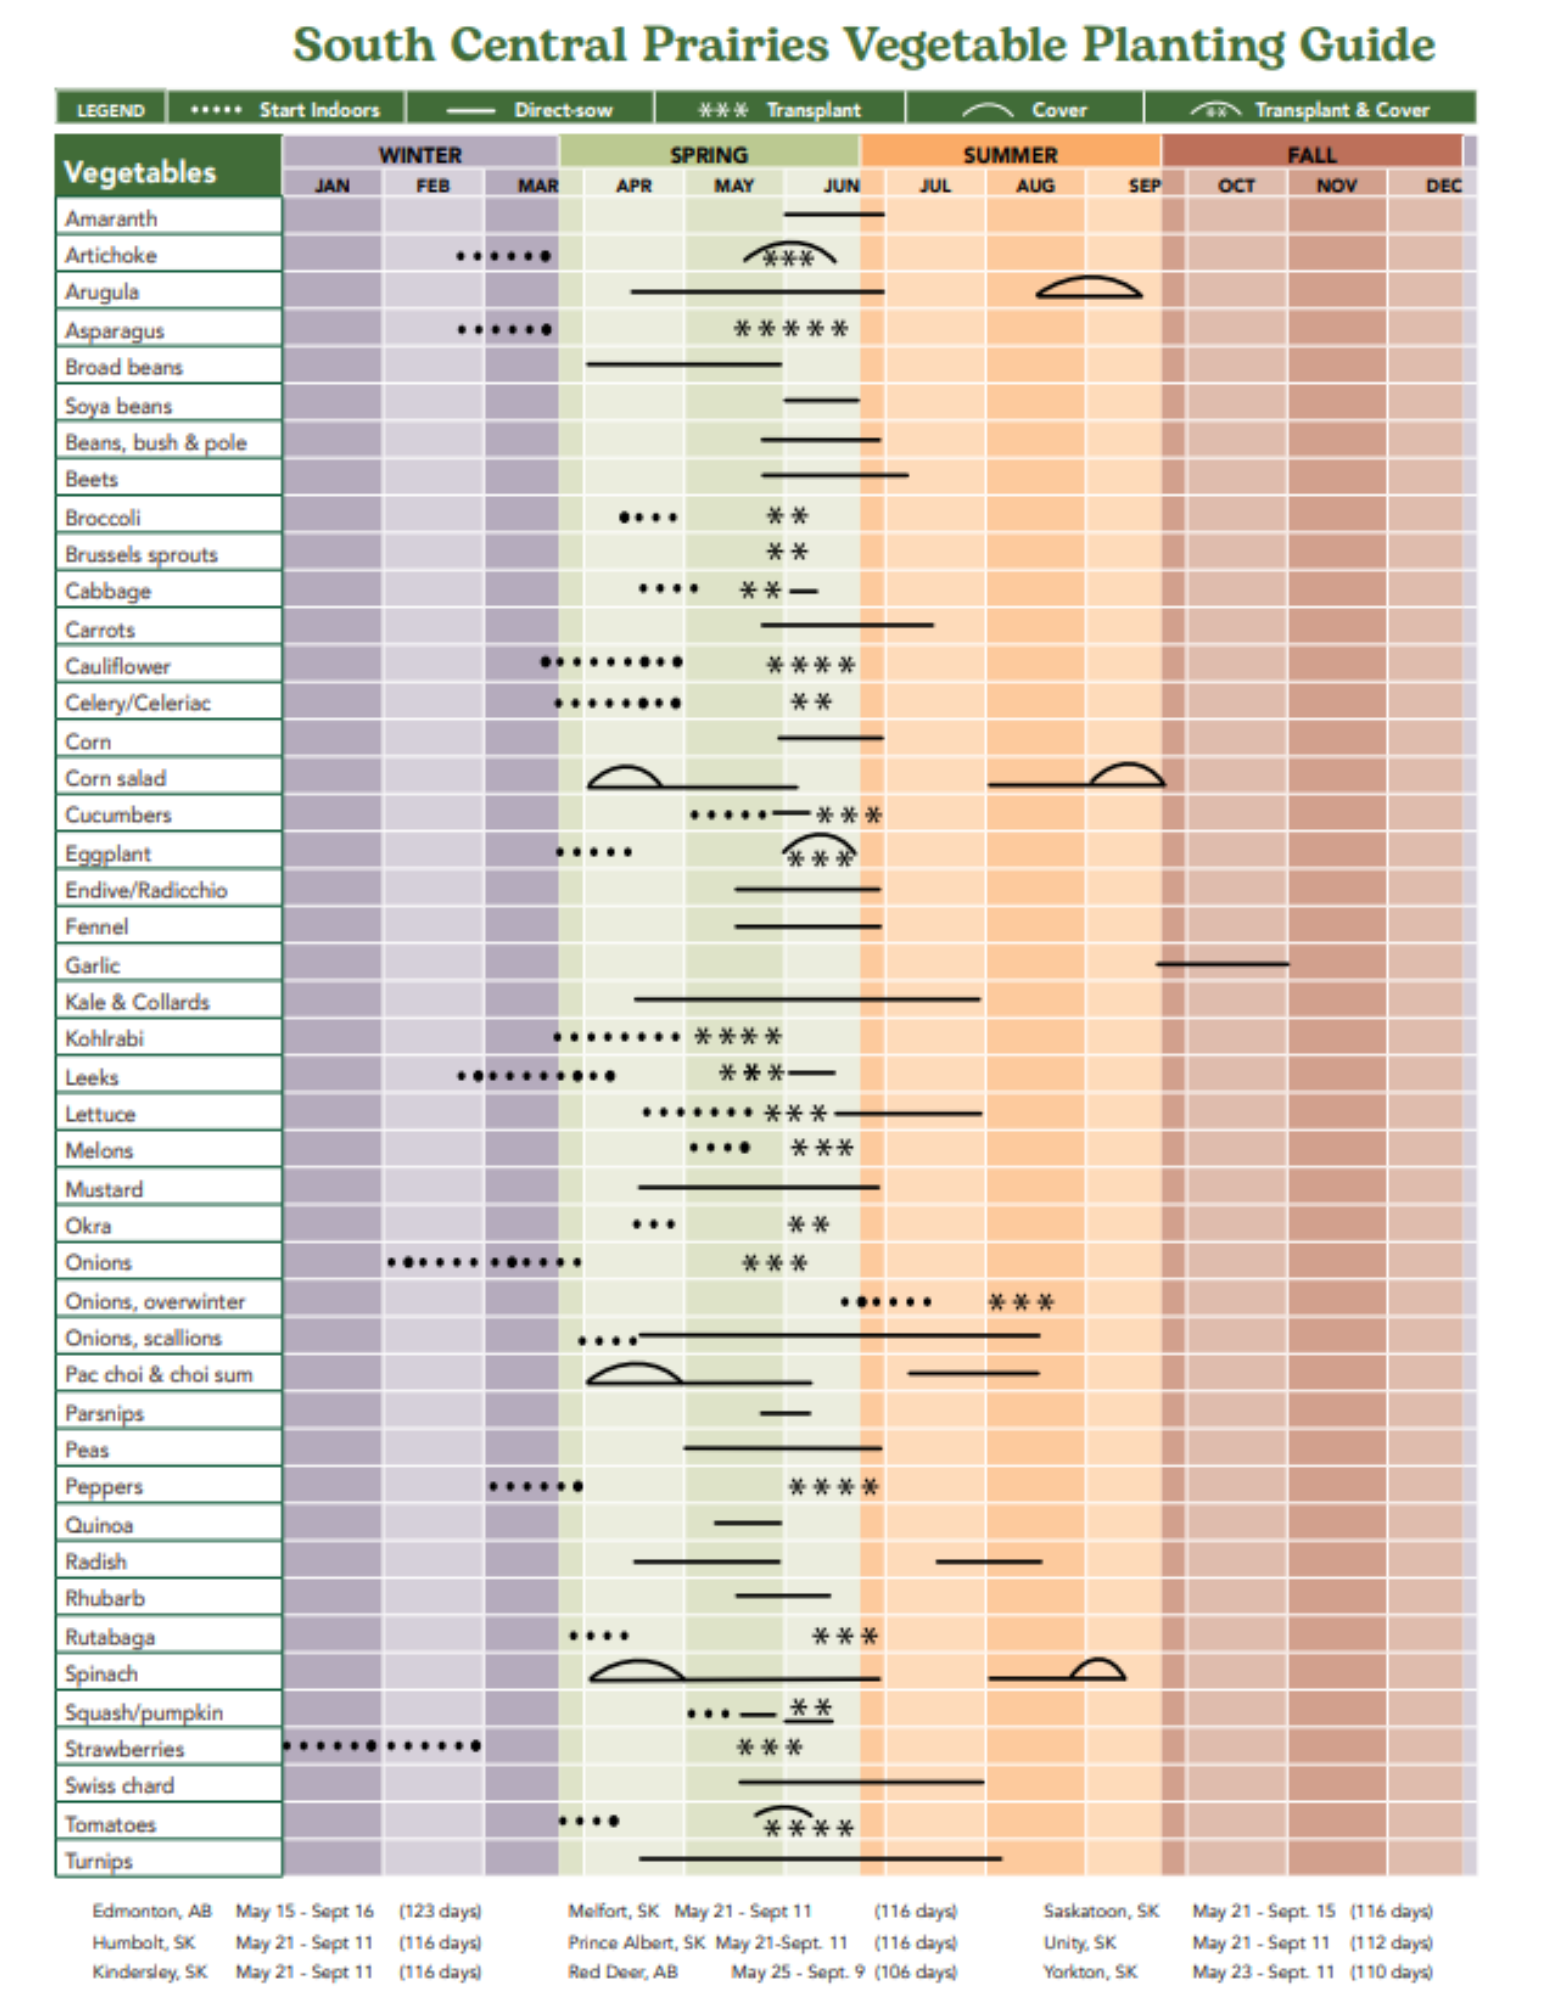
Seed-Starting Calendars & Calculators
There are plenty of seed-starting date calculators online. They can be super helpful — just make sure you’re looking at one for your region.
Manitoba and BC, for example, have very different frost-free windows. What works on the West Coast may not work here.
If you’re ever unsure, check your local frost dates and count backward from there.
Now Let’s Talk About How to Start Seeds Indoors
There’s no single “right” way to do this.
The best setup depends on:
• How much space you have
• How many varieties you’re growing
• What your budget looks like
• What your seeds require (always read the packet!)
Some seeds need steady warmth.
Some need extra light.
Most need consistent moisture.
Here are a few simple options that we offer:
Greenhouse Kits
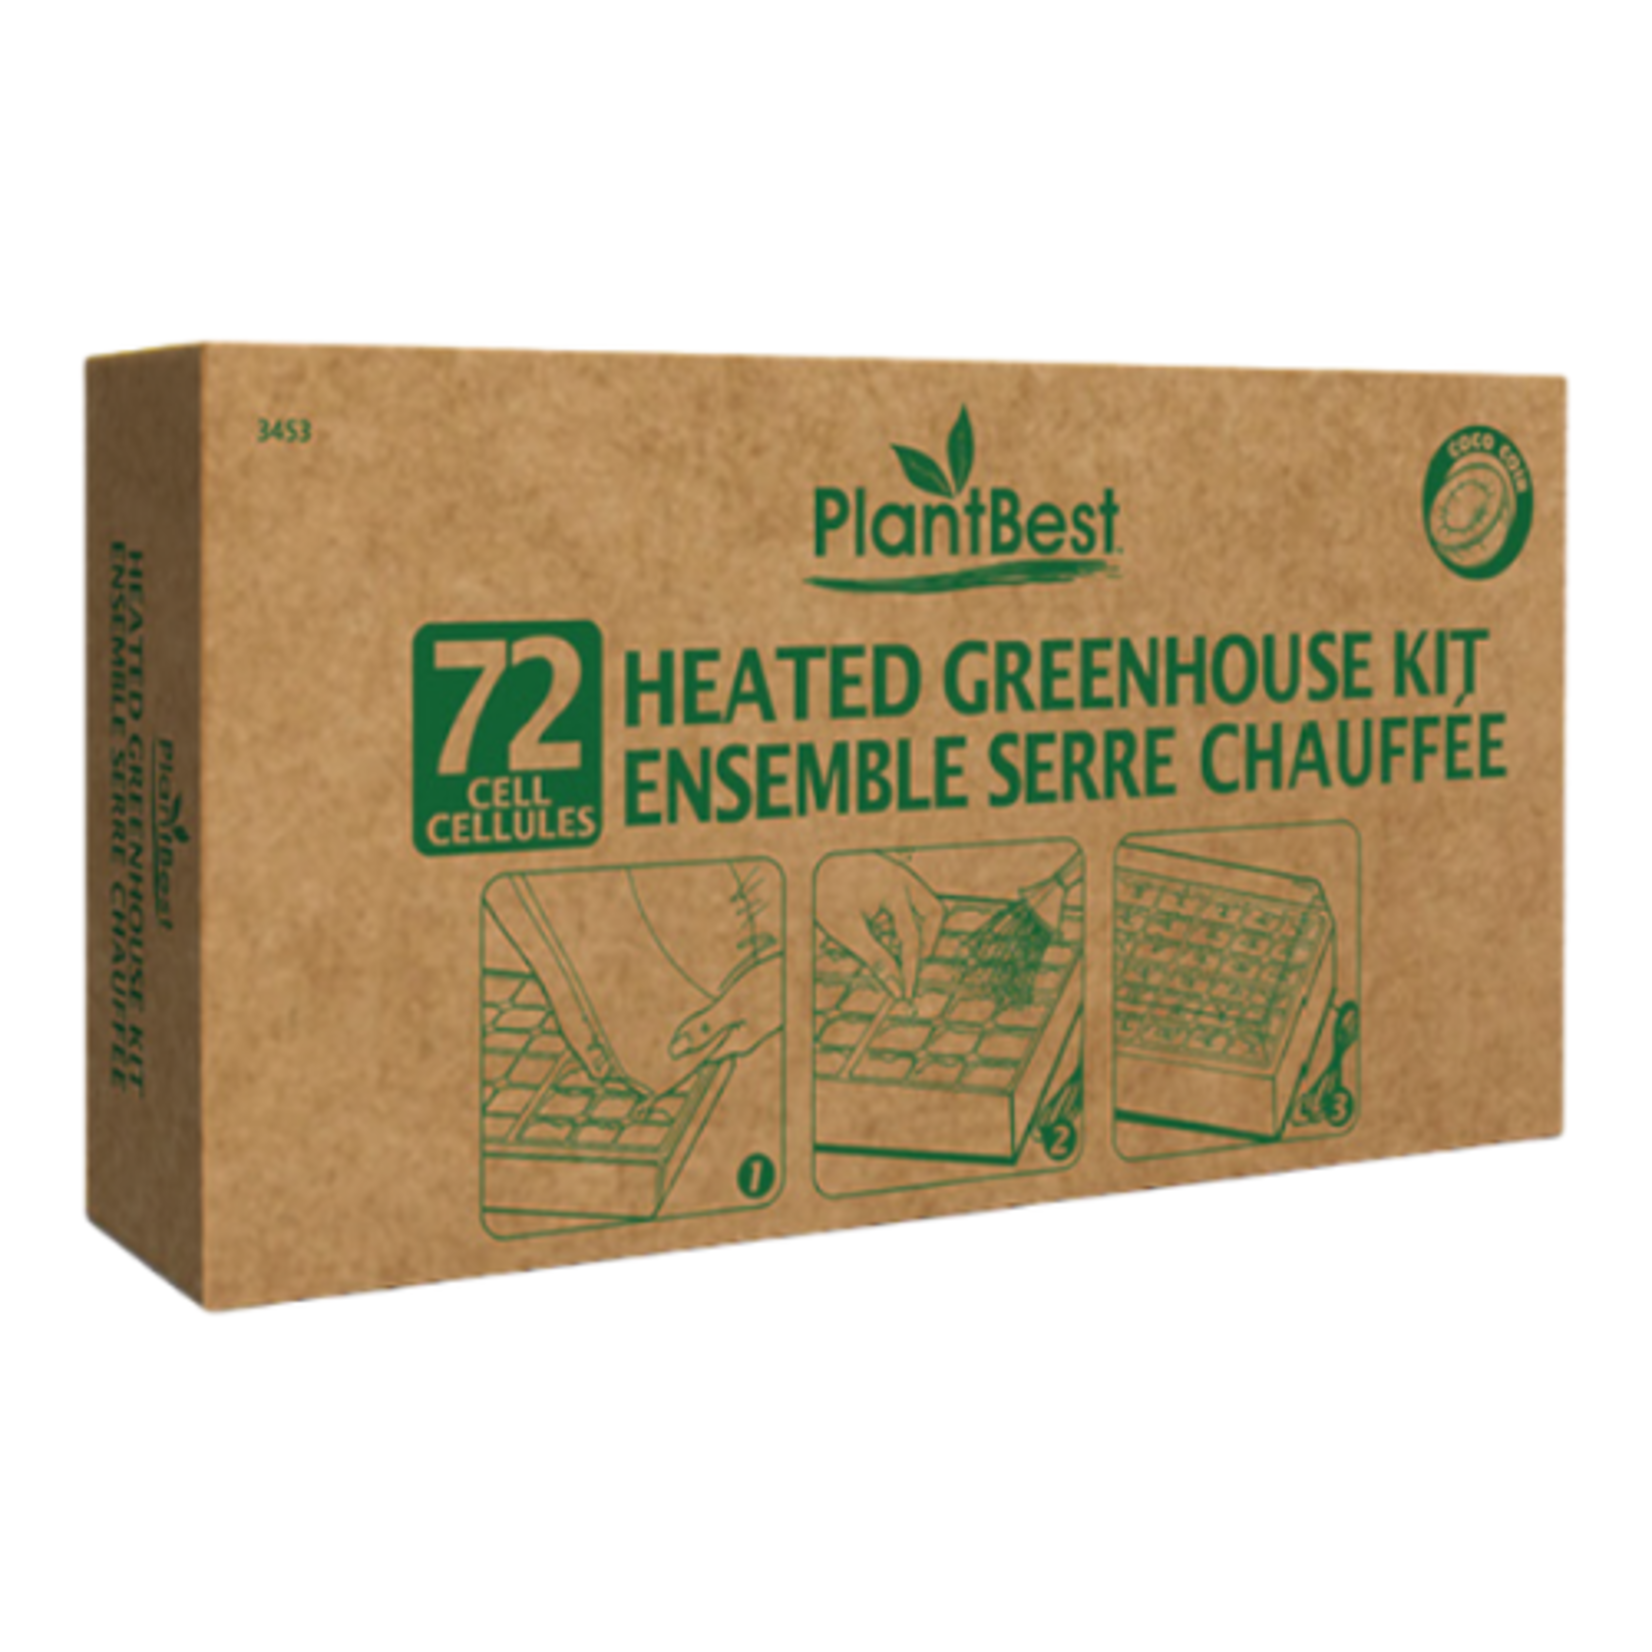
Perfect if you’re just getting started.
These usually include:
• A cell or plug tray
• Growing pellets
• Sometimes a humidity dome
• Sometimes a heat mat
Heat mats are helpful for seeds that need consistent warmth to germinate (like peppers). Just make sure you’ve got a plug nearby!
Great option if you’re starting several different varieties at once.
Pots
If you’re trying just 3–5 varieties, small pots might be your best bet.
They:
• Take up less space
• Cost less
• Are easy to move around
Just make sure they have drainage holes. Too much water with nowhere to go can cause seeds to rot.
Trays
Starting a lot of seeds? Trays are your friend.
Tips for trays:
• Label everything (you will forget what’s what)
• Plant in neat rows instead of scattering seeds
• Group varieties with similar germination times together
If one variety pops up quickly and the others are slower, the fast ones can stretch while waiting for light.
Domes
Humidity domes help hold in moisture and warmth during germination.
Paired with a heat mat, you’ve basically created a mini greenhouse at home.
You can even add a small thermometer/humidity gauge if you want to level up your seed-starting game.
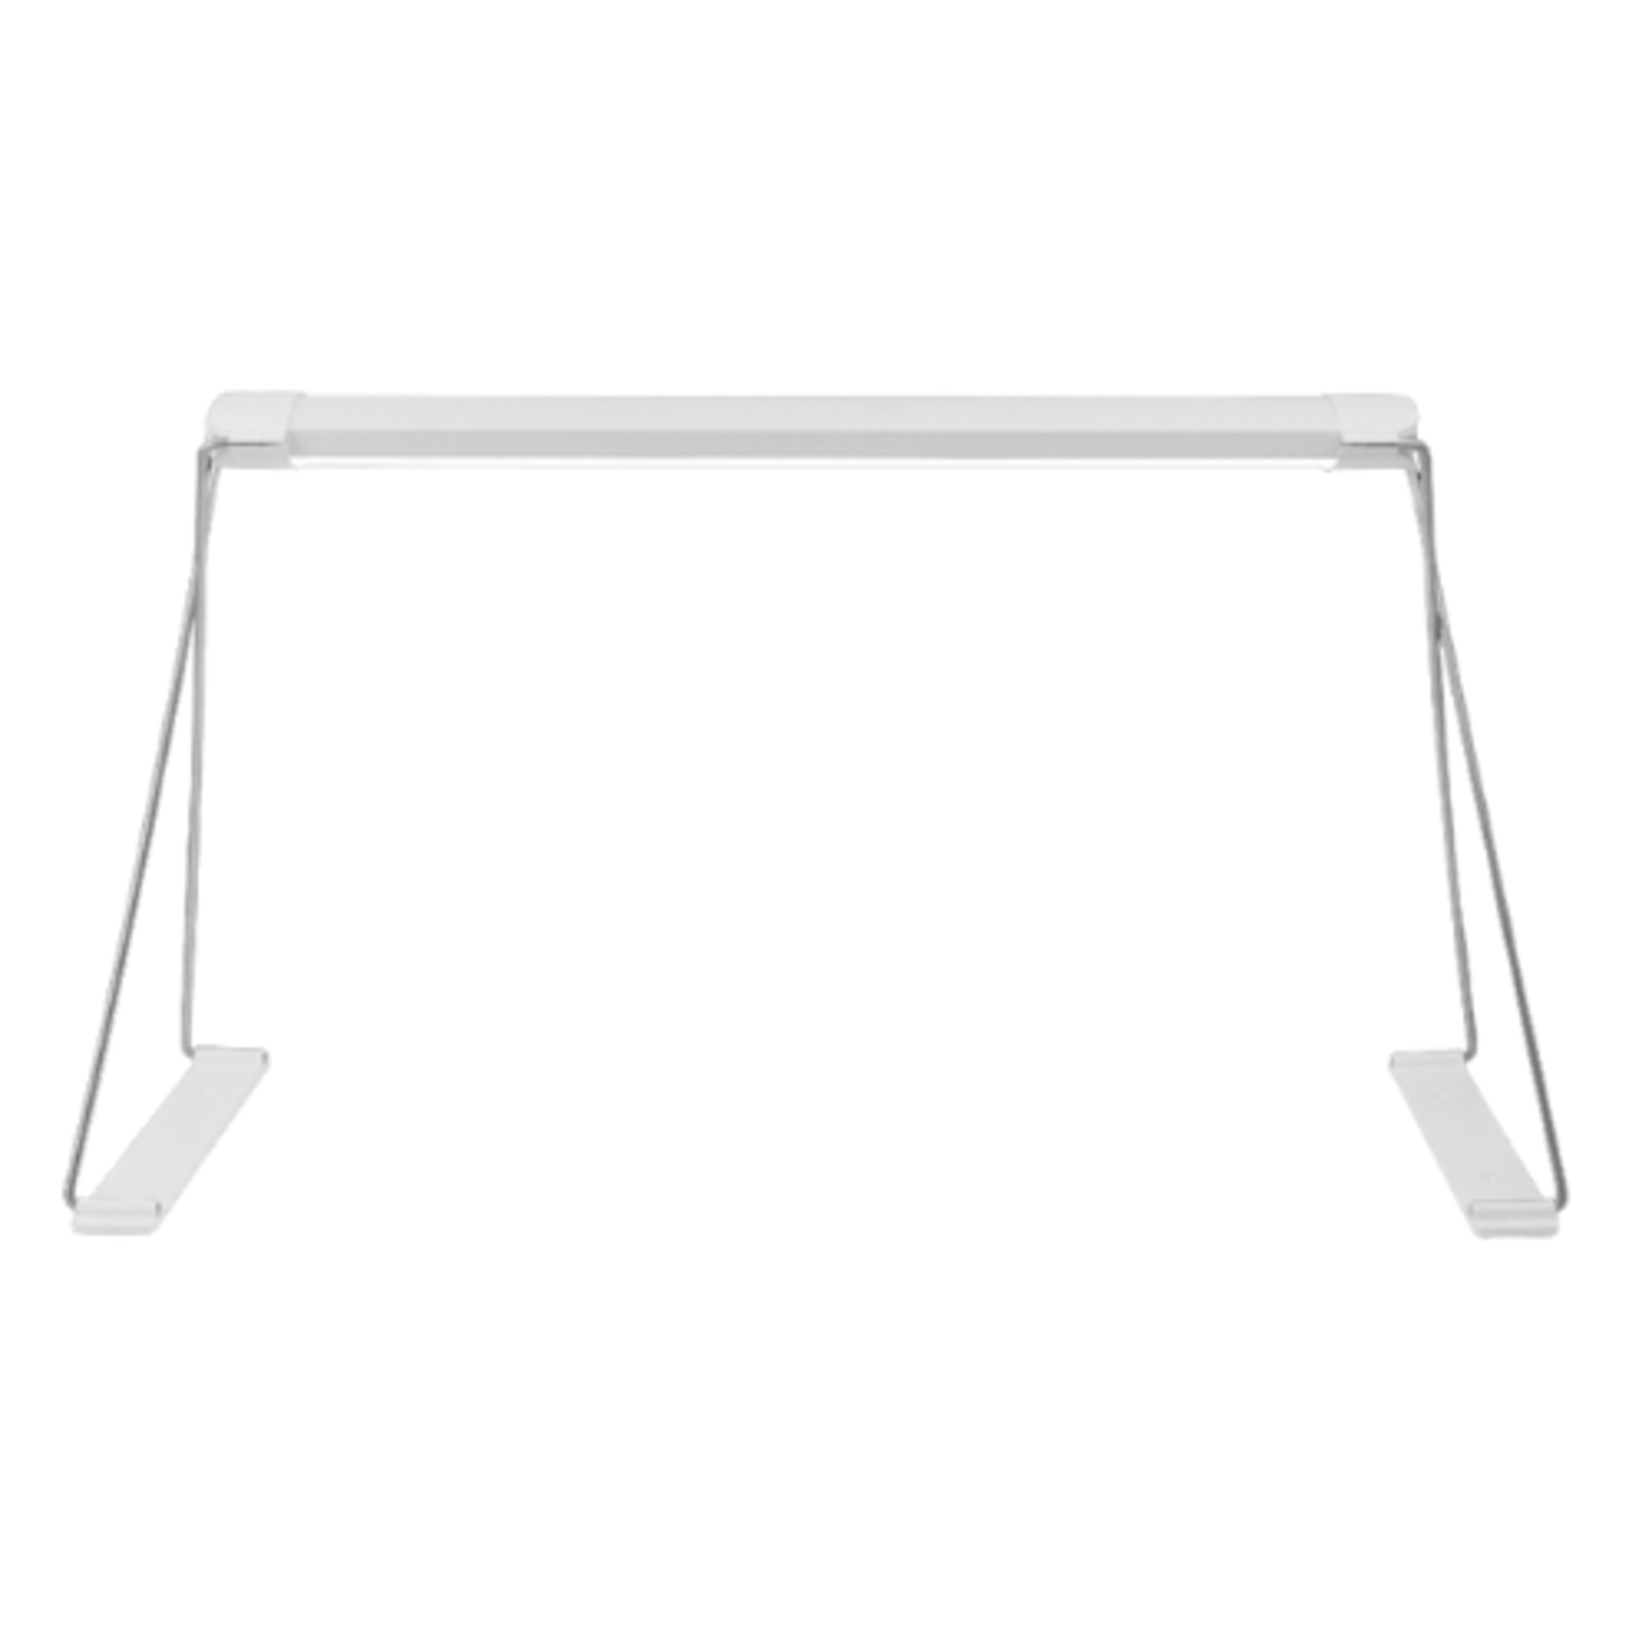
Grow Lights
Most seeds don’t need light to germinate — but once they sprout, they immediately start searching for it.
If they don’t get enough light, they stretch.
If your seedlings stretch, don’t panic. They’re not garbage. Just move them to:
• A bright sunny window
• Or under a grow light
Grow lights make a big difference, especially during our shorter spring days.
Clean & Reuse
The good news?
Most seed-starting supplies can be reused year after year.
Just be sure to:
• Clean and sanitize trays, pots, and domes
• Store them properly
• Replace pellets or soil as needed
This prevents disease and pests from carrying over into the next season.
You Don’t Have to Plant Everything
Just because you bought the seeds doesn’t mean you need to plant them all.
Most seeds stay viable for about three years if stored in a cool, dry place (some gardeners even keep them in the fridge).
And if you do end up with extras?
Plants make wonderful gifts for neighbors and friends.
The Best Part
There are many ways to start seeds — and none of them have to be perfect.
Read your seed packet.
Do a little research if needed.
Start with what you can manage.
Watching a tiny seed turn into something that feeds your family or blooms beautifully in your yard is incredibly rewarding. It’s a small act that feels like magic every single time.
Next week, we’ll dig into another important question:
What’s the best soil for starting seeds?
See you then
- Now Hiring: Seasonal Fashion Associate
- Online Ordering now Available!
- Now Hiring: Landscaping Labourer
- EVOLVE Info Series Part 3
- Week 2 - Right Seed, Right Time
- EVOLVE Info Series Introduction Part 1 & 2
- Week 1 - Starting Strong
- Tropical Day
- Incoming Tropical Plants: Week 3
- Poinsettia Clearance - 60% off
Comments
Be the first to comment...